Micro, sand. Micro, sand. Micro, sand. Micro, sand. Micro, sand.
Micro, sand. Get the picture?
I use a 33" long by 8" wide sanding block made from 3/8" acrylic, with an aluminum box beam glued to the back for stiffness. It holds three full pieces of 8.5" x 11" sandpaper. I also use a 1/3 sheet hand sander and a palm sanding block. I use 36 grit and sometimes do the last micro layer with 100 grit. I NEVER use a power sander - too paranoid about chewing into the glass.
I micro'ed the wing tops and bottoms, the winglets, the strakes, the canopy, the
turtleback, the fairings, and as much of the fuselage as I could get at with it right side
up, and without the canard in place. I used the West Systems epoxy for filling - it
sands a lot easier than the other epoxies. At some point, I gave up and said
"this is the right shape, and it's smooth enough". I was wrong, of course,
but that's what I thought at the time. Finished, right?
 No, wait! There's more. Prime, sand. Prime,
sand. Prime, sand. Prime, sand. Prime, sand. Prime, sand. See? I told you.
No, wait! There's more. Prime, sand. Prime,
sand. Prime, sand. Prime, sand. Prime, sand. Prime, sand. See? I told you.
So I decided to use the Smooth Prime Primer from PolyFiber. This is a water based polyurethane primer that can be brushed, rolled, or sprayed. Having sprayed the Featherfill on my first plane, I wanted to roll the primer on this one, both to save primer and to eliminate overspray. This primer is great - I highly recommend it. It goes on well with a little thinning and cures quickly. It sands easily (the only drawback is you have to dry sand, so you absolutely have to wear a mask and you generate a TON of dust). I found that the best way to apply it is to put on 3 - 5 thin coats and then sand with 100 grit. This will fill most of the weave, micro sanding scratch marks and pinholes. Then another 2 - 3 coats will be necessary, with a 220 grit and 320 grit sanding to smooth it out and get it ready for painting.
In the two crappy pictures above, you can see the winglet and the right wing top and
strake primed and almost ready for painting.
 I didn't know where to put this, so I put it here in
Chapter 25, although it doesn't make a lot of sense. This is my implementation of Robin
DuBois' tie down. It's mounted on the outboard bottom wing/strake bolt, and freely
rotates on the washers. The small hole rotates down and is used to attach the rope.
Gravity keeps the tie down horizontal and hidden when not in use.
I didn't know where to put this, so I put it here in
Chapter 25, although it doesn't make a lot of sense. This is my implementation of Robin
DuBois' tie down. It's mounted on the outboard bottom wing/strake bolt, and freely
rotates on the washers. The small hole rotates down and is used to attach the rope.
Gravity keeps the tie down horizontal and hidden when not in use.
 So After sanding the top of the fuselage and strakes,
I needed to flip the plane over to sand the bottom. I invited a few friends over and
bribed them with pizza. The first thing we had to do was disassemble the garage so that
the plane could come out - you can see the double doors of the house across the street,
and my garage is built the same. However, when we had the house built, we put a
steel beam over the doors so that the center post isn't structural and could be easily
removed by unscrewing the 4387 lag bolts (well, 6 really) that the contractors used to
install it. Obviously the garage doors have to be in the "up" position to
remove the center post.
So After sanding the top of the fuselage and strakes,
I needed to flip the plane over to sand the bottom. I invited a few friends over and
bribed them with pizza. The first thing we had to do was disassemble the garage so that
the plane could come out - you can see the double doors of the house across the street,
and my garage is built the same. However, when we had the house built, we put a
steel beam over the doors so that the center post isn't structural and could be easily
removed by unscrewing the 4387 lag bolts (well, 6 really) that the contractors used to
install it. Obviously the garage doors have to be in the "up" position to
remove the center post.
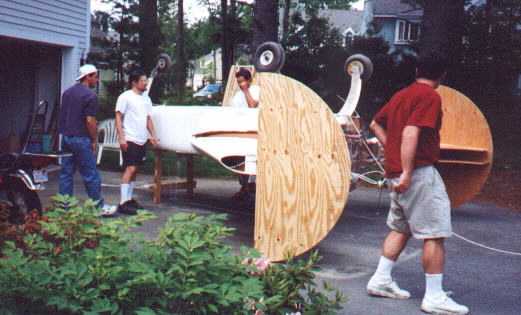
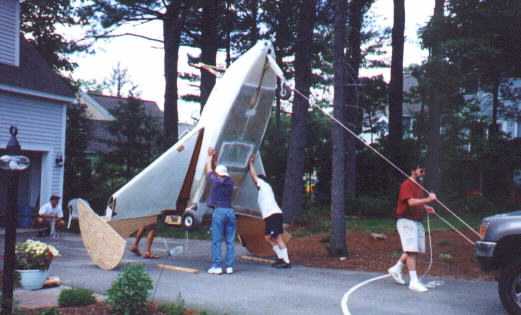 We used the half round plywood "feet" you see
in these pictures to assist in flipping the plane and supporting it when it's upside down.
It actually wasn't as hard as I thought it would be to flip it - with the five of us, it
was pretty easy. We tied off the nose gear onto a truck so that the plane couldn't fall
over backwards, although it turns out that wasn't necessary - two people could hold it up
easily.
We used the half round plywood "feet" you see
in these pictures to assist in flipping the plane and supporting it when it's upside down.
It actually wasn't as hard as I thought it would be to flip it - with the five of us, it
was pretty easy. We tied off the nose gear onto a truck so that the plane couldn't fall
over backwards, although it turns out that wasn't necessary - two people could hold it up
easily.
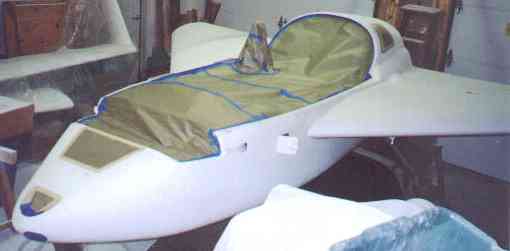
 So here's the beast upside down, with the plywood
"feet" sitting on small platforms with casters so that we could roll the plane
around. I built a crude 2x4 support and clamped it to F-22 to hold the nose of the
plane up and about level.
So here's the beast upside down, with the plywood
"feet" sitting on small platforms with casters so that we could roll the plane
around. I built a crude 2x4 support and clamped it to F-22 to hold the nose of the
plane up and about level.
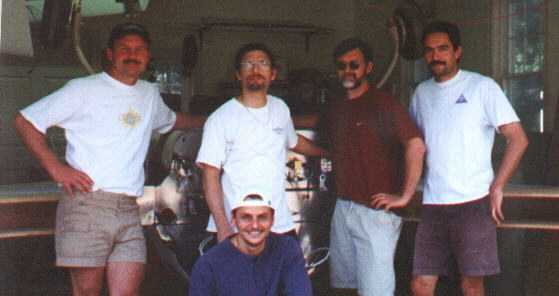 The obligatory picture of the moving crew - Claude, me,
Pete, Joe, and Carmen. We had a good time.
The obligatory picture of the moving crew - Claude, me,
Pete, Joe, and Carmen. We had a good time.
So after we got the thing upside down and back in the garage, I continued to Micro, sand. Micro, sand. Micro, sand. Micro, sand. Micro, sand. Micro, sand and then Prime, sand. Prime, sand. Prime, sand. Prime, sand. Prime, sand. Prime, sand. As of August 12th, 2001, I have about finished with everything except the last 320 grit sanding of the fuselage bottom and the upper cowling. If I never see another piece of sandpaper again, it'll be too soon.
The painting started with the engine mount, which I painted gloss white enamel (Rustoleum from a can) and the instrument panel cover, which I painted satin black for glare resistance (Rustoleum from a can). I painted all the metal parts with green zinc oxide primer. Then I painted the aluminum mixture knob red, the instrument panel metal parts satin black (the instrument panel will be black as well), the nose gear door(s) white, and the headset plug faceplates with a blueish speckle paint (Fleckstone - wierd stuff when it comes out of the can).
I began using the HVLP turbine/gun and Top Gloss Insignia White paint (from Polyfiber - it's a water based polyurethane, and relatively non-toxic). I started with the bottom of the small parts, like ailerons, rudders, elevators, canard, etc. It's VERY thin stuff, and runs easily, so I needed to put on thin coats. It also orange peels easily, and after the first day, it became obvious that I'd have to color sand everything after painting to get out the imperfections. Oh, well - the manual says you'll have to do that, but I was hoping.......
Anyway, I painted the bottoms, waited a week, sanded out the runs, and then painted the tops. I also painted all the rest of the small stuff (Landing Gear, fuselage top, canopy, etc.). After a few painting sessions, I figured out what settings to use on the gun for paint volume and fan size, and I also figured out how much to thin the stuff to get it to flow well.
Peeling masking tape out from under this stuff is a pain, too - it's incredibly tough, and doesn't like to rip when I pulled up the tape. I really had to use a razor blade to slit the paint as I pulled up the tape around the canopy and windows.
After moving all the parts into the living room, I took the wings down from storage, cleaned them off, and painted the bottoms. I flipped them over, painted the tops and winglets, and then painted the fuselage bottom (while it was still upside down. While still upside down, I sanded the whole bottom with 320-through 2000 grit wetordry sandpaper. I then rented a polisher, got three levels of polishing compound, and spent a weekend polishing the bottom of the fuselage and some of the rest of the stuff.
 My friends then helped me roll the thing
back onto it's feet and remove the plywood gizmos. I masked the interior and then painted
the top surfaces. While I wouldn't call the painting process a fiasco, it could have
gone better. Using an HVLP gun with the Top-Gloss just isn't the right combination -
it's one or the other. Lots of runs, lots of orange peel, lots of sanding necessary.
My friends then helped me roll the thing
back onto it's feet and remove the plywood gizmos. I masked the interior and then painted
the top surfaces. While I wouldn't call the painting process a fiasco, it could have
gone better. Using an HVLP gun with the Top-Gloss just isn't the right combination -
it's one or the other. Lots of runs, lots of orange peel, lots of sanding necessary.
After everything was painted, I color sanded with 220 - 2000 grit paper. I sanded
throught the paint in a couple of places, and had to patch it. There are some spots
on the plane that look crappy because of this, but it's smooth and clean, and it's still a
pretty decent 20 foot paint job.
 After all the sanding I polished all the
parts and the fuselage top, and then masked everything for painting the interior with
Fleckstone speckle paint. I used a lot more than I thought I would - I think about 7
cans. It gets all over the place, but looks pretty good.
After all the sanding I polished all the
parts and the fuselage top, and then masked everything for painting the interior with
Fleckstone speckle paint. I used a lot more than I thought I would - I think about 7
cans. It gets all over the place, but looks pretty good.
It has been brought to my attention that I still have the "recommendation" in the above page regarding the Polyfiber products. Having now had these products on my aircraft for 2.5 years in an outdoor environment, I strongly believe that you should AVOID these products at all cost. The Top Gloss has been removed from the market, due (I believe, although Polyfiber won't admit it in public, but have said so to another builder) to extremely poor performance when exposed to the environment, and the Smooth Prime can, in many cases, bubble and exude brown goo underneath the finish paint, also when exposed to the environment. It also (in my opinion) should be removed from the market.
My plane's paint is chalky, chipped, and blistered, after only 2.5 years of living outside. The areas on the underside that are not exposed to UV are still relatively glossy. The paint on the top can be wiped off with your fingers. Areas that live under the cover are also still glossy. I will need to get the plane sanded down to bare micro and refinished within the next few years - what a pain in the ass.
[Prev]
[Next]| [Zeitlin's Cozy MKIV Information] [Zeitlin's Cozy MKIV Logbook] [Cozy MKIV Information] |
Copyright © 2000 - 2005, All Rights Reserved, Marc J. Zeitlin
e-mail: marc_zeitlin@alum.mit.edu