 You can see a raw view of the front seat area in the first
photograph.
You can see a raw view of the front seat area in the first
photograph.[Prev]
[Next] You can see a raw view of the front seat area in the first
photograph.
I started out by cutting out all the 3/8" foam for the armrests, thigh rests, rear seat backs and rear center console. I glassed one (or both) side(s) with either 1 or 2 BID (as appropriate).
After floxing and glassing the front and rear thigh rest supports to the fuselage bottom, I then assembled and glassed the rear center console. I glassed the outside of the armrests with 2 BID. I then laid up small 3 BID pads on the fuselage near over the bottom of each armrest (protected with box sealing tape) to act as "catches" to minimize the number of screws necessary to hold the armrests in place. I laid up small glass pads on the fuselage sides for the armrest sheet metal attachment screws, and then laid up small flanges on the armrest to go over these pads.
I scored the seat foam (front and rear) and temporarily attached the thigh rests (front and back) to the supports, then glassed the top side with 2 BID. After that cured, I trimmed the front seats to fit around the front armrest transition area. I closed out the seat rear edges with flox and 1 BID underneath.
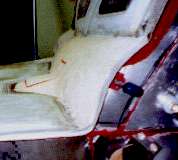
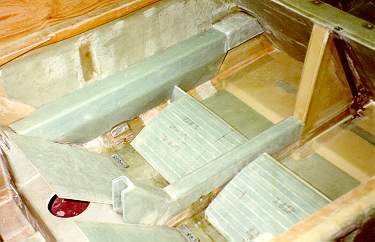 You can see a finished view of the rear seat area in the
second photograph.
You can see a finished view of the rear seat area in the
second photograph.
I laid up 4 BID pads where the rear seatbacks and thigh rest hinges attach to the fuselage, and then attached the seatbacks with hinges. I decided to let the rear thigh rests work like the front ones - why bother with hinges?
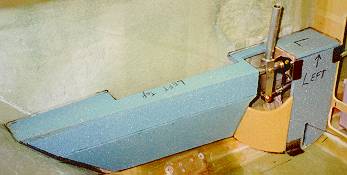
The plans don't have any detailed information about making a cover for the landing brake mechanism/spring area in the right rear foot space, so I took some 1/4" foam, cut it to fit over the mechanism, and glassed it. I'll hold it in place with either with velcro tabs or with sheet metal screws.
I then stopped work on this chapter until after finishing the strakes and canopy.
 Since I didn't have the space to build the strakes, I decided to go
back to the canard cover. I mounted the canard to the fuselage and then built a fence
around the perimeter (protected with saran wrap) to contain the pour foam that I used to
create the cover (rather than the 2" urethane foam called out in the plans). I can't
verify that this took less time than the plans method, or that I got better results. The
pour foam takes more effort to carve well and sands harder, however I didn't have to shape
it to fit the canard and micro it in place. Six of one.........
Since I didn't have the space to build the strakes, I decided to go
back to the canard cover. I mounted the canard to the fuselage and then built a fence
around the perimeter (protected with saran wrap) to contain the pour foam that I used to
create the cover (rather than the 2" urethane foam called out in the plans). I can't
verify that this took less time than the plans method, or that I got better results. The
pour foam takes more effort to carve well and sands harder, however I didn't have to shape
it to fit the canard and micro it in place. Six of one.........
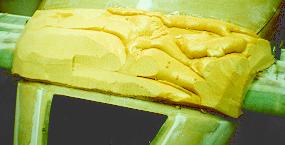
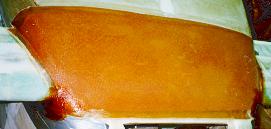
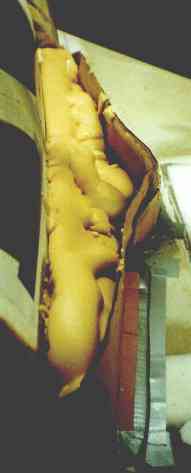
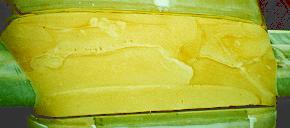 You can see the raw pour foam (it took about 5 - 6 pours to fill the
space) in the first picture, with the carved, sanded and blended foam in the second
picture.
You can see the raw pour foam (it took about 5 - 6 pours to fill the
space) in the first picture, with the carved, sanded and blended foam in the second
picture.
 The last picture shows the cover (2 BID) lapping onto the canard
skin and wrapping under the canard as well. The front and rear of the cover lap onto the
fuselage.
The last picture shows the cover (2 BID) lapping onto the canard
skin and wrapping under the canard as well. The front and rear of the cover lap onto the
fuselage.
I removed the canard from the fuselage and laid up 2 BID in the front and rear to close out all exposed foam, strengthen the front and rear lips, and ensure that the cover will stay attached to the canard.
 Here you can see the beginnings of the top
strake fairings. I've built a wall from cardboard and duct tape and have used
urethane pour foam to build up the raw material for the fairing. After ensuring that
I had enough foam in place, I removed all the duct tape and cardboard. I then began
shaping the foam with a small saw, hacksaw blade, and sanding blocks.
Here you can see the beginnings of the top
strake fairings. I've built a wall from cardboard and duct tape and have used
urethane pour foam to build up the raw material for the fairing. After ensuring that
I had enough foam in place, I removed all the duct tape and cardboard. I then began
shaping the foam with a small saw, hacksaw blade, and sanding blocks.
 You can see the finished shape of the foam
here. The "lump" on the top of the strake covers the electronic fuel level
sensor. I installed them on the outside of the strake so as not to have any entrance
points into the fuel tank inside the fuselage. I will probably make a door over each
"lump" so as to gain access to the sensor if necessary.
You can see the finished shape of the foam
here. The "lump" on the top of the strake covers the electronic fuel level
sensor. I installed them on the outside of the strake so as not to have any entrance
points into the fuel tank inside the fuselage. I will probably make a door over each
"lump" so as to gain access to the sensor if necessary.
After finishing the carving, I glassed each strake fairing with two layers of BID fiberglass.
After sawing through the fairing so as to gain acces to the interior of the aircraft again, I glassed the bottom and rear of the fairings on the canopy, as well as the front of the fairings on the fuselage/turtleback. I then contoured each fairing with micro.
I laid up a 4 BID strip on the rear of the canopy to overlap the turtleback. This acts as both a rain/water shield and an aesthetic cover. Due to an imperfect mismatch (actually, a perfect mismatch - just and imperfect match) between the canopy and the turtleback, I had to sand down one or the other along the joint area with a belt sander to match them up. I glassed 1 BID over the turtleback sanded areas prior to creating the lip. I then filled the contour with micro.
I also made urethane blocks and shaped them to fit under the strake at the fuselage
joint. I was able to fair them in reasonably well with the fuel sumps under each
strake, however the sumps have slightly different shapes, so the fairings do not match
perfectly. Oh, well.
[Prev]
[Next]| [Zeitlin's Cozy MKIV Information] [Zeitlin's Cozy MKIV Logbook] [Cozy MKIV Information] |
Copyright © 1997 - 2001, All Rights Reserved, Marc J. Zeitlin
e-mail: marc_zeitlin@alum.mit.edu