[Prev]
[Next]
Cozy MKIV - Chapter 20
Building the Winglets and Rudders
Start Date: June 16, 1996
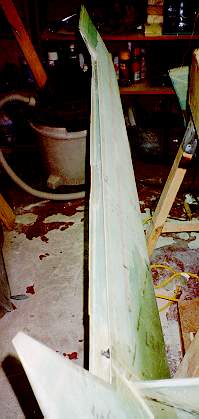
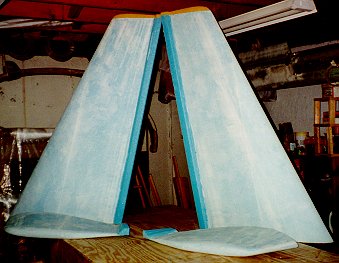 I started out by pasting the hot-wire template plans onto 1/16"
aluminum, and then cutting the hot-wire templates out with a bandsaw and a belt sander.
Deanie and I hot-wired the cores and I glued urethane tips on and carved them to shape.
Then I proceeded to hard-shell
them in preparation for glassing. In contrast to the hard-shelling I attempted in chapter
13 on the nose, this worked VERY well on the polystyrene hot-wire foam. After three
coats of alcohol diluted micro with a LOT of microballoons and sanding, the cores
seemed ready for glassing. You can see the prepared cores here:
I started out by pasting the hot-wire template plans onto 1/16"
aluminum, and then cutting the hot-wire templates out with a bandsaw and a belt sander.
Deanie and I hot-wired the cores and I glued urethane tips on and carved them to shape.
Then I proceeded to hard-shell
them in preparation for glassing. In contrast to the hard-shelling I attempted in chapter
13 on the nose, this worked VERY well on the polystyrene hot-wire foam. After three
coats of alcohol diluted micro with a LOT of microballoons and sanding, the cores
seemed ready for glassing. You can see the prepared cores here:
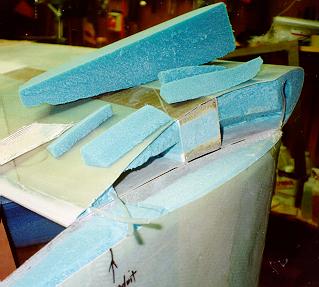
I glassed the cores with 2 UNI and 1 BID (lower front only) and peel-plied them
completely. The trailing edges did NOT come out well - our hot-wiring did
not line up correctly and the trailing edge warped to one side. I will correct this using
the following method. When the time comes to join the winglets to the wings, I will do so,
and then cut out the rudders. Since they make up the bulk of the trailing edge (except for
the top couple of inches) into the trash they will go. I will cut new rudders out and
glass them using Jeff Russell's (AeroCad's) technique for trailing edges (which I'll
describe in Chapter 19).
Next, I went back to Chapter 19 to finish the wings
before continuing on with the winglet attachment.
Hiatus
 Well, that took a bit longer than expected. Anyway, I jigged the left
wing on the table and used the winglet matching template and the winglet to cut the tips
of the winglet and wing to the correct shapes. I then bondoed the winglet to the wing as
described in the plans, and measured the positions of the winglet root leading edge, root
trailing edge, and tip trailing edge to ensure that it's incidence was correct. At that
point, I bondoed a 1" x 2" in place to guarantee that the winglet wouldn't move.
I then flipped the wing over (carefully) and prepared the foam and glass for all the
inside layups. Per plans, I laid up all the inside layups, floxing, foaming, and microing
as I went.
Well, that took a bit longer than expected. Anyway, I jigged the left
wing on the table and used the winglet matching template and the winglet to cut the tips
of the winglet and wing to the correct shapes. I then bondoed the winglet to the wing as
described in the plans, and measured the positions of the winglet root leading edge, root
trailing edge, and tip trailing edge to ensure that it's incidence was correct. At that
point, I bondoed a 1" x 2" in place to guarantee that the winglet wouldn't move.
I then flipped the wing over (carefully) and prepared the foam and glass for all the
inside layups. Per plans, I laid up all the inside layups, floxing, foaming, and microing
as I went.
 After that cured, I trimmed the inside layups and shaped
the foam for the first outside layup. I cut the glass (2 BID and 7 UNI) and layed it up. I
peel plyed the whole layup.
After that cured, I trimmed the inside layups and shaped
the foam for the first outside layup. I cut the glass (2 BID and 7 UNI) and layed it up. I
peel plyed the whole layup.
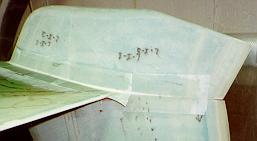
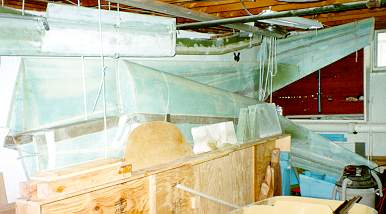
After being out of commission with the Flu for over a week, I decided to mount the
bottom winglet before doing the second outside layup, since flipping the wing over in the
basement is a pain. This actually worked out very well. You can see the bottom winglet
shaped and glassed in place here:
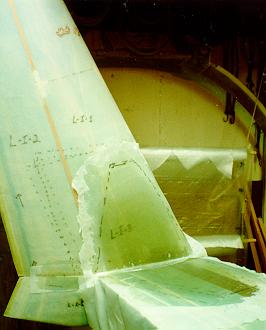
 I then flipped the wing over, removed
the brace and bondo, and layed up the last outside layup (2 BID and 7 UNI) which you can
see here on the left.
I then flipped the wing over, removed
the brace and bondo, and layed up the last outside layup (2 BID and 7 UNI) which you can
see here on the left.
Next, I cut off the rudder, hollowed out the foam for the hinge, spring, and internal
belhorn areas, and then laid up glass internally to finish the winglet layups. I also did
the equivalent layups on the rudder.
You will notice a trailing edge mismatch between the upper and lower winglets. I don't
like the way my trailing edge came out on either winglet. I will cut the rudder out per
plans, but will throw away the cut out piece and fabricate a new rudder from foam and
glass with a good, straight trailing edge. Because I will do this, I didn't care how the
current trailing edge turned out.
As it turned out, the first trailing edge wasn't quite so bad. I was able to cut
through the glass on one side of the T.E. and bend the T.E. into place. I then glassed
over the slit to permanently keep the correct T.E. position.
On the second T.E., I did in fact cut off the last 2.5 inches of the rudder, lower
winglet, and top of the upper winglet and re-make them with new foam and glass layups.
 After mounting all the hinges, return springs and testing the mounting
of the external belhorns, I mounted the rudders on the winglets and hung both wings
up to get them out of the way.
After mounting all the hinges, return springs and testing the mounting
of the external belhorns, I mounted the rudders on the winglets and hung both wings
up to get them out of the way.
End Date: January 11, 1997
[Prev]
[Next]
Copyright © 1996, 1997, All Rights Reserved, Marc J. Zeitlin