[Prev]
[Next]
Cozy MKIV - Chapter 18 (Section 3)
Building the Front Fuselage / Instrument Panel Cover
Start Date: May 31, 1997
 After this, I floxed the hinges to the canopy
and then screwed them in place after the flox cured. I then sawed the front fuselage off
and bondo'd it back in place with mixing sticks. Next, I fitted and floxed the hinges for
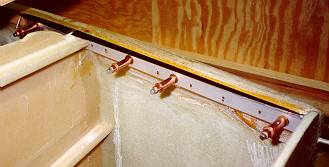
the removable fuselage top to the longerons after floxing and glassing wooden strips in
place. You can see the hinges held in place with greased clecos as the flox cures. I
glassed the flange to F-22 on the front of the fuselage top and floxed the hinge tops in
place at the same time, locating everything with the canopy on its hinges, with the
turtleback in place so that I knew that everything would line up correctly. And it did.
After this, I floxed the hinges to the canopy
and then screwed them in place after the flox cured. I then sawed the front fuselage off
and bondo'd it back in place with mixing sticks. Next, I fitted and floxed the hinges for
the removable fuselage top to the longerons after floxing and glassing wooden strips in
place. You can see the hinges held in place with greased clecos as the flox cures. I
glassed the flange to F-22 on the front of the fuselage top and floxed the hinge tops in
place at the same time, locating everything with the canopy on its hinges, with the
turtleback in place so that I knew that everything would line up correctly. And it did.
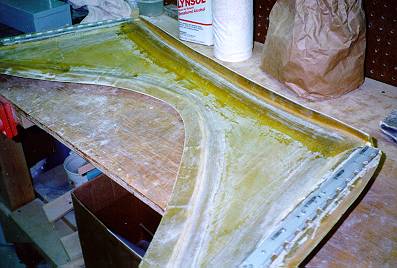 I glassed 4 BID onto the flange and then drilled for and
attached nutplates to assist in holding the fuselage top in place. I glassed the front of
the canopy rim, then glassed the drip rail in place on the underside of the fuselage top.
Lastly, I glassed the rear rim of the fuselage top and the drip rail.
I glassed 4 BID onto the flange and then drilled for and
attached nutplates to assist in holding the fuselage top in place. I glassed the front of
the canopy rim, then glassed the drip rail in place on the underside of the fuselage top.
Lastly, I glassed the rear rim of the fuselage top and the drip rail.
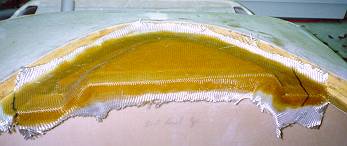 I fitted and carved some urethane foam to fit between the
Front Fuselage and the Instrument Panel, shaped as shown in the plans. I then covered this
(as well as the surrounding areas) with box sealing tape, and layed up 2 BID over the
foam, Instrument Panel, and Front Fuselage. After cure, I trimmed this to shape, glasses a
couple more BID on the front 1.5 inches and made a flox rim on the front. After rounding
this to shape, I riveted four small tabs on the rear of the cover to clip onto the
fuselage front.
I fitted and carved some urethane foam to fit between the
Front Fuselage and the Instrument Panel, shaped as shown in the plans. I then covered this
(as well as the surrounding areas) with box sealing tape, and layed up 2 BID over the
foam, Instrument Panel, and Front Fuselage. After cure, I trimmed this to shape, glasses a
couple more BID on the front 1.5 inches and made a flox rim on the front. After rounding
this to shape, I riveted four small tabs on the rear of the cover to clip onto the
fuselage front.
End Date: July 12, 1997
[Prev]
[Next]
Copyright © 1997, All Rights Reserved, Marc J. Zeitlin