[Prev]
[Next]
Cozy MKIV - Chapter 18 (Section 1)
Building the Turtleback
Start Date: March 12, 1997
I decided to purchase the turtleback from Jeff Russell at Aerocad, to ensure a smooth outer surface and to
save a bit of time. When it arrived, I measured it and found that it was not as wide as
the plans specified. After some consultation with Jeff, during which he offered to replace
it, we decided to try to expand it by heating. I wedged some 1 x 2's into the front and
rear of the TB, placed the whole thing in the cardboard shipping box in which it had come,
and pointed a 1500 Watt space heater into it. After a couple of hours, the temperature
stabilized at approximately 120 degrees F and a couple more hours at temperature, with a
couple of hours cool down had expanded it to the correct size, saving me time and money
for shipping a replacement.
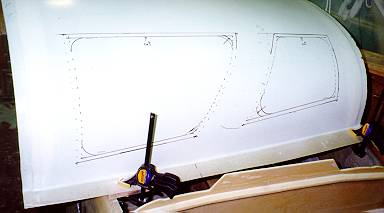 Except for the fact that the turtleback doesn't have
the correct recess in it between the window areas for the lap joint where it opens and
it's about 3/8" short (easily dealt with by placing 3/8" foam under the
flanges), the quality seems very good.
I began by cutting out the foam for the TB bulkhead from scraps of 3/8" foam and
then laid up both sides with BID and peel ply. I trimmed the TB to length (46") and
marked the inside of the TB for the future cut line. I drilled 1/8" holes to mark the
line. I then cut foam for the drip rail, hot glued it in place, and covered it with box
sealing tape. I glassed the TB bulkhead in place, and also glassed over the drip rail
foam.
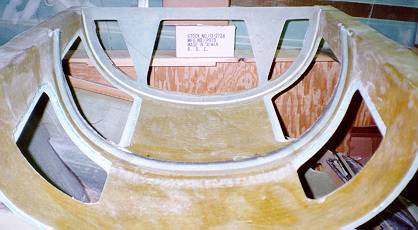 After flipping the TB, I began marking and cutting out the window
frames and windows until I had a good fit for all four. Then I floxed the windows in
place, holding them in with wedges. I finished the inside frames with the BID layups, and
then SprayLat'ed the outside of the windows to protect them.
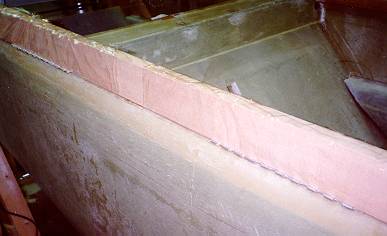 Next, I cut the canopy hinges to length and floxed them to the
fuselage longerons. This photograph illuminates the scintillating use of a 6 foot spruce
straightedge and saran wrap to perform this activity.
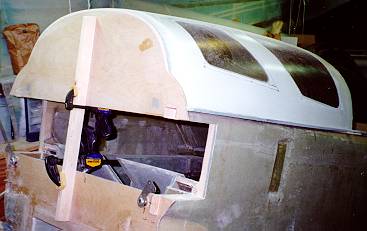 I fitted the TB and upper firewall in place on the
fuselage rear, ensuring that the upper firewall was perfectly vertical and in line with
the lower firewall. I shimmed the TB to the correct height in the rear, and shimmed it
about 1" higher in the front to accommodate the slightly larger canopy and give a bit
more headroom. I drilled positioning holes through the flanges and the longerons, and use
AN3 bolts to hold the TB in perfect alignment. I then glassed 2 BID tape on the exterior
of the TB and firewall to hold the upper firewall to the TB rear. I'll do the interior
tape when the TB comes off later.
End Date: April 5, 1997
Addendum:
Start Date: January 8, 1999
 Well,
after a LONG wait, I finished the main spar attachment and the strakes. I began the
attachment of the turtleback to the fuselage by ensuring that it (and the canopy) still
fit on the fuselage and to each other. Since they did, I cut the BID strips for the
TB/Fuselage inside and outside layups, as well as the TB/Spar layups. I used a bit
of pour foam to fill the space between the TB and the longerons (since I had increased the
height of the front of the TB by about 1/2" for more headroom), and then floxed the
TB to the longerons. I then glassed the 3 layers of TB/Spar layups and the inside
and outside TB/Fuselage layups. You can see the result in the image to the left:
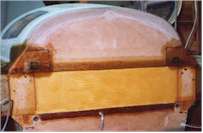 I cut the glass and layed up the 5 BID
outside top engine mount reinforcing layups and the 8 BID inside engine mount reinforcing
layups. After this, I cut a piece of 1/4" foam to fit over the main spar center
area and fitted the two center plywood sections of the firewall to the spar/TB/firewall
area. I then floxed and glassed these in place with 1 BID per plans.
End Date: January 24, 1999
[Prev]
[Next]
Copyright © 1997, 2000, All Rights Reserved, Marc J. Zeitlin
email: marc_zeitlin@alum.mit.edu
 Except for the fact that the turtleback doesn't have
the correct recess in it between the window areas for the lap joint where it opens and
it's about 3/8" short (easily dealt with by placing 3/8" foam under the
flanges), the quality seems very good.
 After flipping the TB, I began marking and cutting out the window
frames and windows until I had a good fit for all four. Then I floxed the windows in
place, holding them in with wedges. I finished the inside frames with the BID layups, and
then SprayLat'ed the outside of the windows to protect them.
 Next, I cut the canopy hinges to length and floxed them to the
fuselage longerons. This photograph illuminates the scintillating use of a 6 foot spruce
straightedge and saran wrap to perform this activity.
 I fitted the TB and upper firewall in place on the
fuselage rear, ensuring that the upper firewall was perfectly vertical and in line with
the lower firewall. I shimmed the TB to the correct height in the rear, and shimmed it
about 1" higher in the front to accommodate the slightly larger canopy and give a bit
more headroom. I drilled positioning holes through the flanges and the longerons, and use
AN3 bolts to hold the TB in perfect alignment. I then glassed 2 BID tape on the exterior
of the TB and firewall to hold the upper firewall to the TB rear. I'll do the interior
tape when the TB comes off later.
 Well,
after a LONG wait, I finished the main spar attachment and the strakes. I began the
attachment of the turtleback to the fuselage by ensuring that it (and the canopy) still
fit on the fuselage and to each other. Since they did, I cut the BID strips for the
TB/Fuselage inside and outside layups, as well as the TB/Spar layups. I used a bit
of pour foam to fill the space between the TB and the longerons (since I had increased the
height of the front of the TB by about 1/2" for more headroom), and then floxed the
TB to the longerons. I then glassed the 3 layers of TB/Spar layups and the inside
and outside TB/Fuselage layups. You can see the result in the image to the left:
 I cut the glass and layed up the 5 BID
outside top engine mount reinforcing layups and the 8 BID inside engine mount reinforcing
layups. After this, I cut a piece of 1/4" foam to fit over the main spar center
area and fitted the two center plywood sections of the firewall to the spar/TB/firewall
area. I then floxed and glassed these in place with 1 BID per plans.