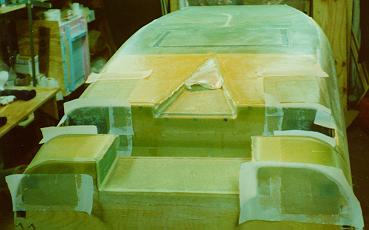
| I started out by cutting out the urethane foam for the NACA scoop
area, as well as the plywood braces and foam for the LG Bulkhead/Firewall
area. I micro'd the foam in place, floxed the plywood braces in place,
put 2 BID on the firewall/RLG bulkhead braces, and then sanded the foam
to shape. I then contoured the bottom corners of the fuselage, being
careful not to cut into the bottom longeron more than indicated (no more
than 1/4" showing). I also faired the fuselage sides back in the area
under the spar cutout to come flush with the firewall.
|
|
| I wasn't comfortable (for no particular reason) with the aluminum
inserts for the LG cover screws being only 1/4" deep, so I made them 1/2"
x 1/2" x 1/4", and floxed them in place after routing out the holes for
them with a dremel tool. I glassed 2 BID on the two scoop areas (in
front of and behind the LG opening) and had a hell of a time
getting the glass to lay down in the 1" x 1/8" "joggle" recess for the LG
cover (as Marty Kansky said I would). I used peel ply, wooden strips,
tongue depressors, and weights in a Rube Goldberg setup to hold
everything in place overnight.
|
|
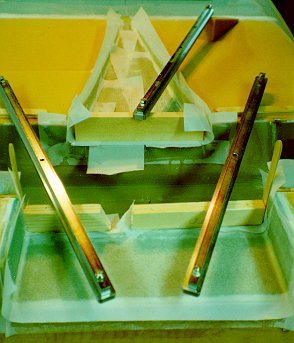
| I trimmed the scoop, floxed the scoop corners, routed a cable
channel for a NAV antenna in the fuselage bottom, and soldered and glued
up a NAV antenna per RST standards. I hot melt glued this in place in
the channel, stuck the copper tape to the foam, and pushed the cable
through a hole in the fuselage just in front of the Instrument Panel.
Here's the antenna (after glassing):
|

|
| I rough cut a piece of wood for the step mount, and cut the foam
away from the fuselage for it to mount in. I hot melt glued the brake
back in place, and used duct tape to build up the area around it. I then
cut the glass for the bottom layup, and then microed the antenna cable in
the trough. I floxed the step mount in place, and shaped it to match the
fuselage after cure.
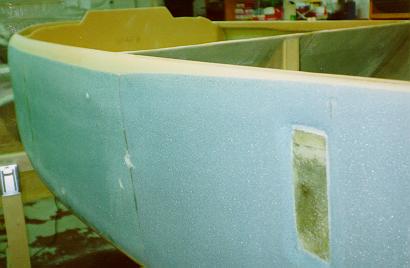
Then, I microed the whole fuselage bottom, carefully lined up the UNI
glass, and epoxied the 2 layers of UNI in place. I added 3 layers of UNI
around the Landing Gear and Motor Mount attach points, and then peel ply'ed
the edges. I checked the side-side and front-back level, and then left it
alone for a day. Here's the bottom layup:
|
|
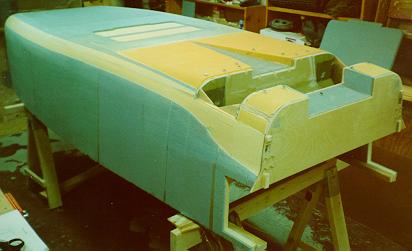
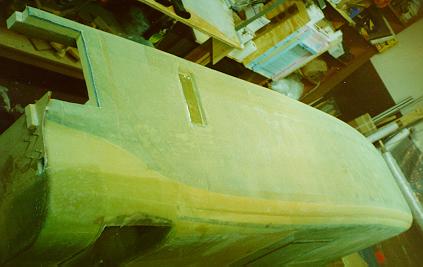
| I sanded and trimmed the bottom layup around the edges, and then
turned the fuselage over and used a Stanley Surform plane to carve the
top of the fuselage sides to shape (using the templates as a guide).
Here's what that looks like:
sideways and mounted it on the "A-frames" with quick-clamps.
|
|
| Again, I microed the whole fuselage right side, carefully lined up the UNI
glass, and epoxied the 3 layers of UNI in place, one at a time. I added 3
layers of UNI along the upper longeron, and 3 layers of UNI around the
Landing Gear and Motor Mount attach points. I added the 2 layers of BID
around the rear bottom corner, and then peel ply'ed the whole thing. I
checked the vertical level, and then left it alone to cure. Here's what
the right side layup looks like:
|
|
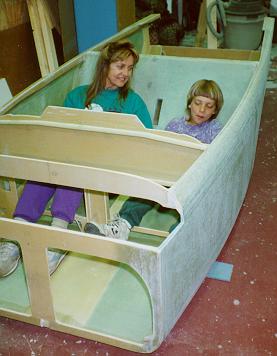
| After trimming and sanding the right side layup, I flipped the fuselage and
repeated the whole deal for the left side. I've got a finished,
lightweight, fuselage tub that I can sit in (with the fuselage on foam
blocks) and make "VROOM" noises with my son. Here's my wife and son doing
exactly that:
|
|