
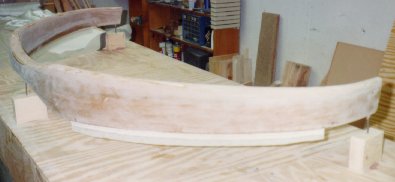
First, I sanded the strut smooth and rounded all the edges, then I cut 8 pieces of UNI 16" wide at 30 degrees for the second torsional layup. I 5 min. epoxied 1/4" I.D. drinking straws to the trailing edge of the strut, and then built up an aluminum tape support for 2 ply BID over the straws. You can see the aluminum tape and the straws (if you squint a bit) in this image:
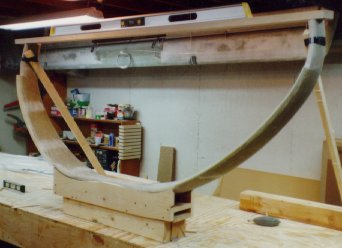
I glassed the 2 BID next to the straws and filled the area over the straws with micro. I mounted the strut on three blocks with 3" drywall screws sticking out of them, so that there were only three small points supporting the strut, with about 5" clearance under it. I then glassed the 4 UNI torsional layup over the strut. You can see the strut just prior to the layup in this image:
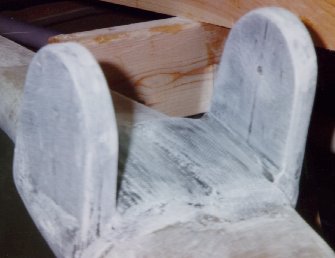
Next, I built the jigs to hold the landing gear strut mounting tabs in the correct place, and mounted the jigs on the strut. Then, I mounted the whole contraption on the worktable, supporting the strut with 1"x2" strapping. With the strut in the air, I microed the trailing edge to fair in with the rest of the strut.

Next (after cutting the 15" long UNI for the first 25 ply of tab layup), I realized that there wasn't a chance in hell that this would reach around the strut, and I had to recut 18" long pieces. Maybe AeroCad's struts have different dimensions than Featherlite's, but I can't imagine how anyone could use 15" long pieces and have them reach. Anyway, I then spread epoxy on 5 layers of UNI and 4 layers of BID, cut all the strips to size, and then applied them to the struts (a total of 25 UNI layers and 20 BID layers - 45 layers total). Even after squeegeeing with a hair dryer, I couldn't BELIEVE how much epoxy I could squeegee out of the glass as I layed it up on the strut. Then, after I had put all the layers on and squeezed the tabs with the clamping blocks, MORE epoxy came out! Unbelievable. This image shows the setup while curing.
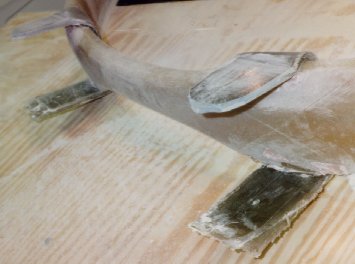
After cure, I used a drill jig to drill out the 1/4" pilot holes for the Landing Gear mounts. They lined up perfectly! I then broke the jigs down, carefully chiseled and sawed them off the strut, and then hacksawed and sanded the mounting tabs to their final shape - 3" wide with a 1.5" radius on the ends. You can see the semi-finished tabs here.
I sanded and vacuumed the strut, and then laid up the next 45 layers of UNI and BID (20 UNI, 25 BID this time). After sawing and sanding the tabs to shape again, I redrilled the 1/4" pilot holes, and was ready to begin mounting the gear on the fuselage.
After setting the strut in place in the fuselage, it became immediately
apparent that the I had screwed up the length of the tabs, the position
of the 1/4" holes, and that 15" long pieces of glass would have been
more than adequate for the tab layups. For a full description of my
error and the fix, you may read
"An Oaf's Story".
|
[Zeitlin's Cozy MKIV Information]
[Zeitlin's Cozy MKIV Logbook] [Cozy MKIV Information]
|